Blue dip-dyed pillow cover

Here it is... the moment you've all been waiting for. Wait...What? You've been living your own lives and not sitting by your computers waiting for my next project? Well, I figured as much. Good for you for not banking on me being a regular blogger and keeping some sort of schedule. That would be cray-zay!Without any more delay... here's the latest thing I attempted to DIY: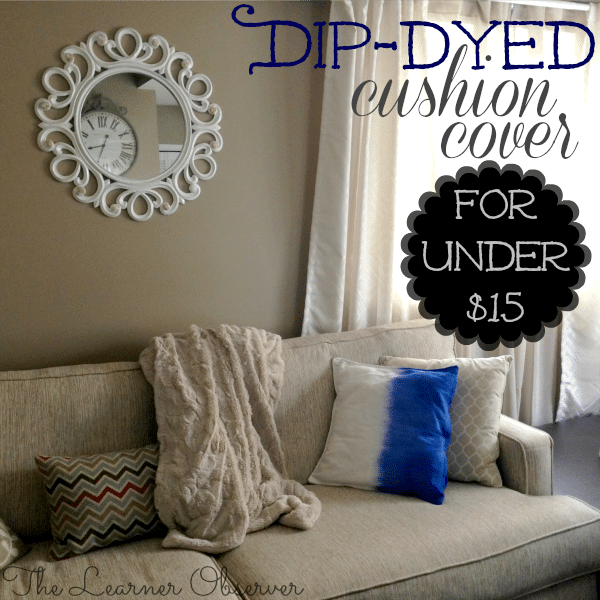 I had a plain white pillow cover, which I purchased at IKEA a few months ago (in case you're interested, it was the RITVA cushion cover for $8.99). I started to get kind of bored with its lack of colour and interest, and as we all know, dip-dyed ANYTHING is super 'in' right now, so I figured... why not? I stopped by Fabricland on a whim one afternoon and picked up some dye. Then I got home and realized I was going to need a large pot that I would be willing to sacrifice for the sake of this pillow since I would never be able to use it again for cooking - not cool. I then hopped into the car to the trusty Salvation Army in town and picked up an old pot. I know... pure genius! Here are the steps illustrated a bit more clearly than my ramblings:
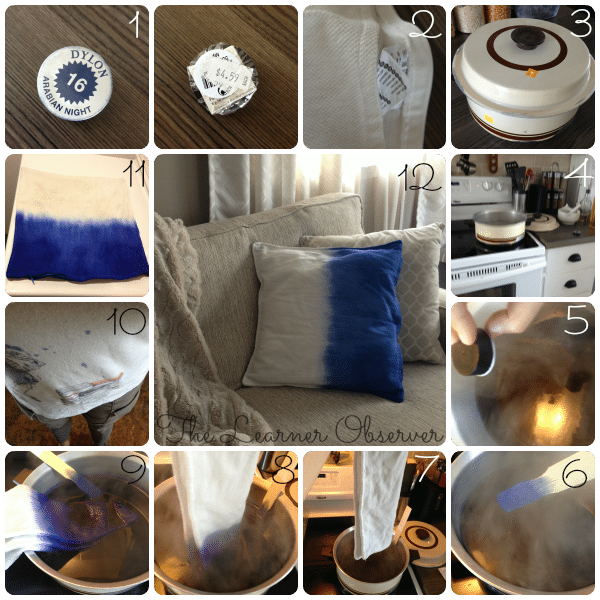 1. Purchased Dylon dye in "Arabian Night." 2. Washed pillow cover, which, by the way, is 100% cotton - bonus when trying to dye something. 3. Get the $4 pot ready and fill with water. 4. Boil water. 5. Add dye. 6. Stir until completely dissolved. 7. Begin the dip! 8. Figure out just how far you'd like the colour to go. I figured just a little under halfway would be fine (the dye bled upwards a little). 9. Let the cushion cover sit in the dye for at least 15-20 minutes. I did my best to keep the whole thing submerged by poking it around a bit. 10. Be ready to endure possible dying tragedies! My t-shirt is not the only victim, sadly! 11. Rinse the cover until water runs clear then lay flat to dry. 12. Put your pillow insert back in and enjoy your work!
Cost breakdown:
Pillow cover = $8.99Dye = $4.59Total = 13.58
So there you have it. A simple way to update a boring white pillow. I didn't include the cost of the pot because it's something most people might have on hand, and it'll be used for other projects now. The thing that made me feel really awesome about it was when I Googled "dip-dyed pillow" and came across some rather expensive options in comparison to mine.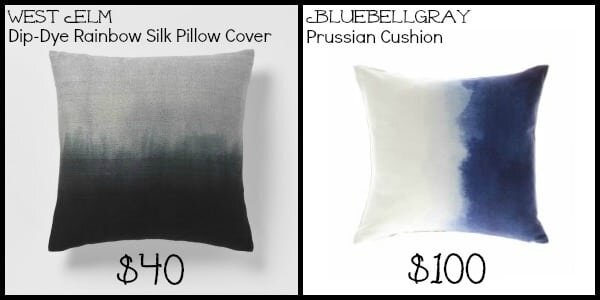 The West Elm version comes in several colours, but blue was not one of them. At $40 for just the pillow cover, it's above what I like to spend on something I know I will change often. The Bluebellgray option was the closest to my own creation, and it includes the stuffing in the cushion (which I paid $4 for, also at IKEA). Talk about a huge price difference! I saved $80 by creating my own.So there you have it, friends. This pillow has been sitting on my dryer, laying flat to dry for over a week now. Why didn't I just walk it upstairs and put it on the pillow until now? I don't know. Why do I feel the need to confess all of my faults to you all? I also don't know... maybe because you seem to understand my imperfections so well!Usual last look? Ok!
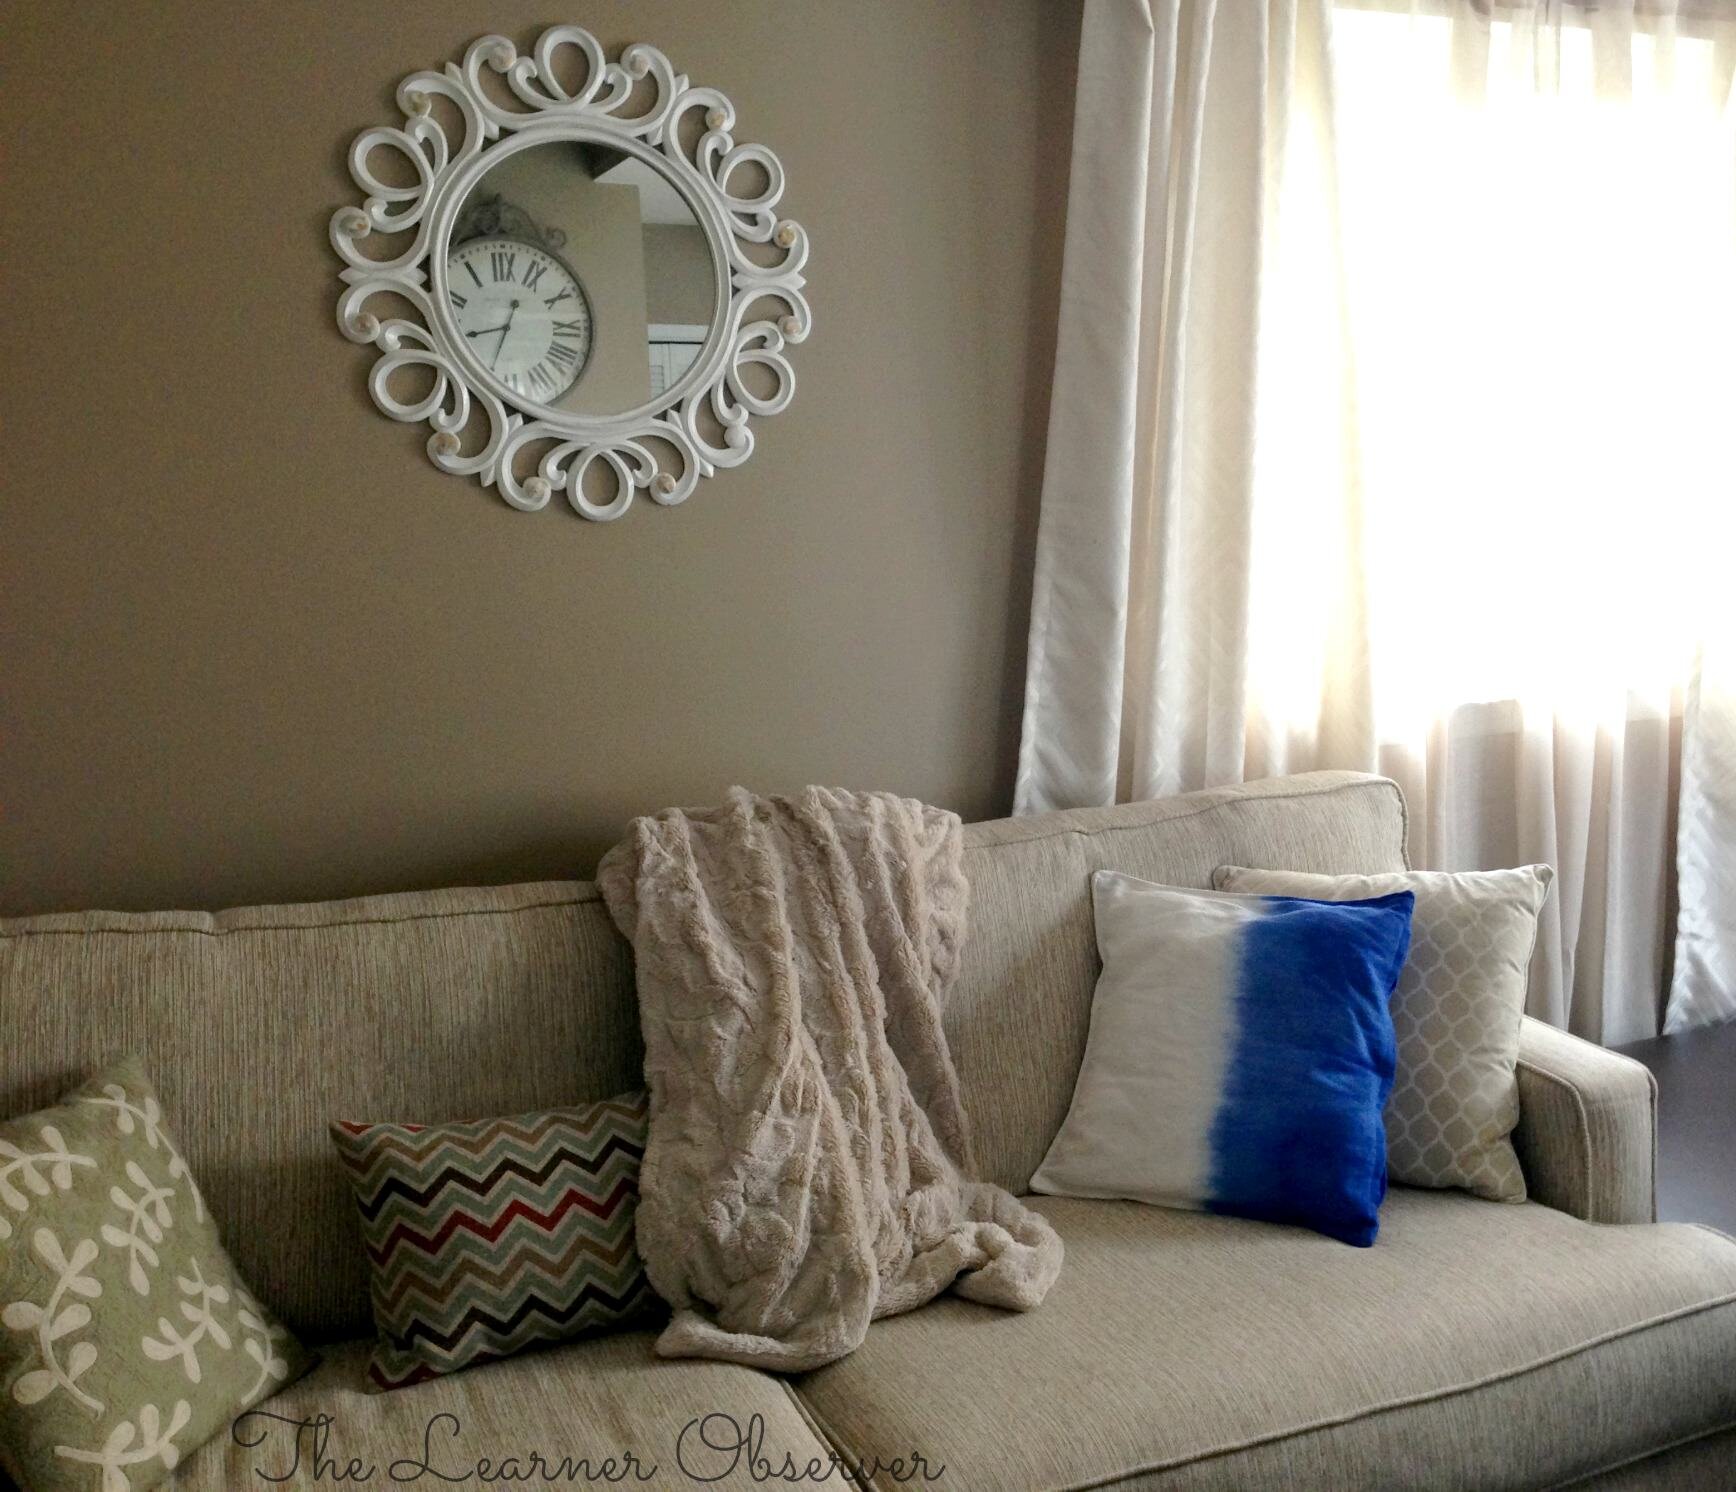
Has anyone else tried a project like this? It's a bit blotchy - probably because I had the cover folded in the pot, but I don't mind its imperfection. What do you think?

Linking up Here and at My Repurposed Life.
This post has been featured!