De-Christmasing the House
Follow my blog with Bloglovin* Excuse the strange symbols you're seeing on my blog lately... just another side effect of the host switch!
________ * ________
On a scale of 1-10, how bad is it that I'm posting about putting Christmas decor away on January 9th? Not THAT bad, right? Plus, I actually took it all down on the 7th, I'm just publishing the post today. And this is not a place of judgement.I'm going to TRY keep this post short and sweet...Being that this was my first year decorating and then un-decorating a house of my own for Christmas, I wasn't sure how to prepare for storing it all. I wanted to do my very best to be organized and not open up random bins 11 months from now only to find ornaments tangled up in one another or worse even, broken! Most of our ornaments are basically family keepsakes now since my mom has been getting my brother and I a unique ornament every year for the last 11 years or so, and for Alex for the past 4 Christmases. Anyway, I said this wold be short...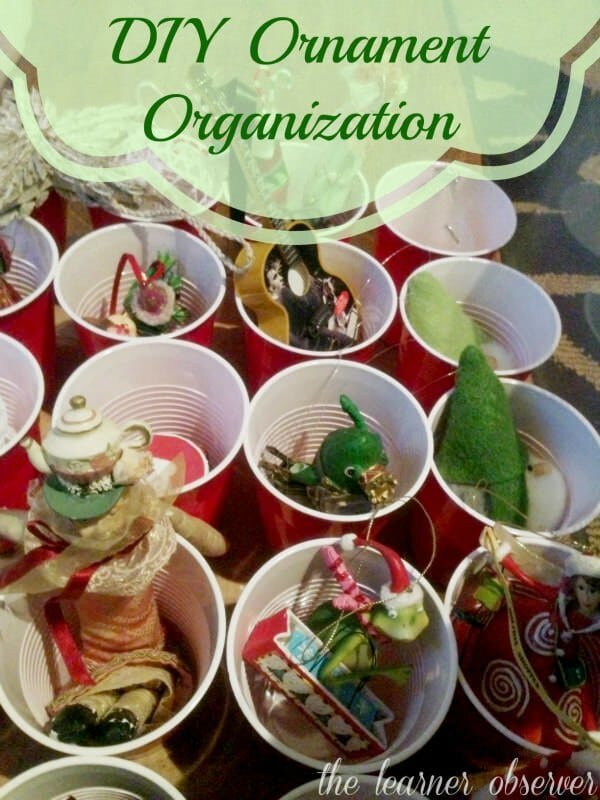 I want you all to know now I am very much aware I am not the inventor of this wonderful idea. I know I have seen something like this somewhere (ahem, Pinterest) before, but I was unable to figure out where I originally saw the idea, so I didn't want to just give a random person the credit. This does not mean I take credit either. I was cringing over putting away all the Christmas ornaments, and I really didn't want to pay $10-$30 for the ornament organization kits I have seen around... My solution was to get some cardboard, a pen, plastic cups, and a hot glue gun and get to work.
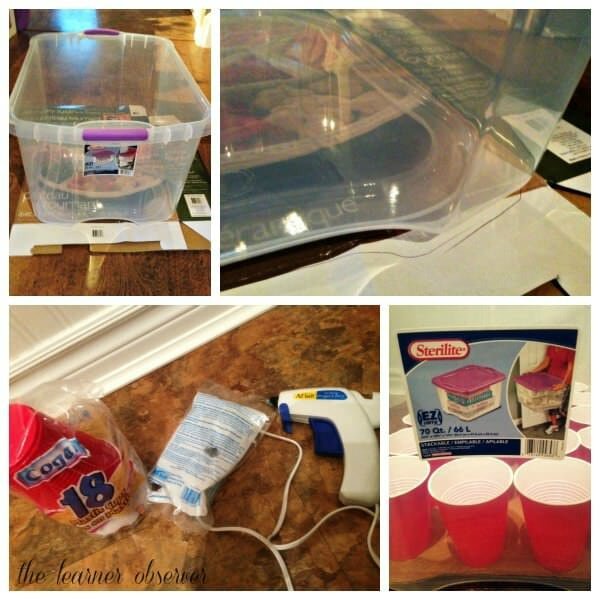 I purchased the bin at Walmart - all sorts of bins are on sale since this is apparently a popular time for cleaning and organizing. I took a box we were going to recycle at home and traced around the bottom of the bin, cut that out, made sure it fit inside the bin and left it in there. I bought 2 packs of cups at Dollarama and without measuring or getting too complicated, I warmed up my glue gun and started putting cups down. Easy peasy! You can see the size of the bin up there in case you're interested in how I got all of the cups to fit so well... I didn't plan for that!Our tree is very small and we don't have too many ornaments yet, so just one layer did the trick for me, but if I need more space next year I'll just stack another layer on top of this one for more stuff. Some of these cups have several ornaments inside them - there are no rules here! I just wanted to make the most of the space I had without breaking anything.
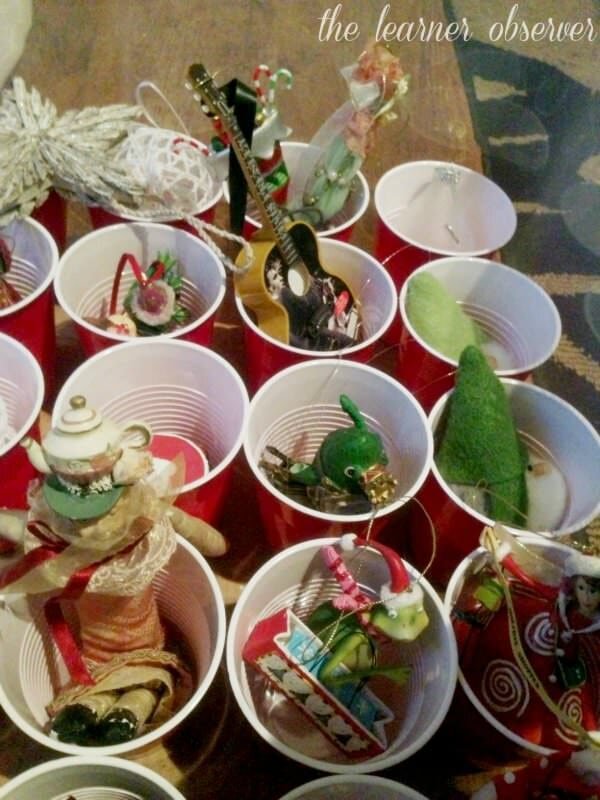 Some of the ornaments were put back in the boxes they were originally sold in. I purposely kept some, knowing I would just hate to find a new home for stuff that already had a nice, neat place to go back to! I already had some labels kicking around, so I stacked some on the lid and labelled everything that is inside. Even though the contained is clear, I want to avoid having to open boxes to see what's inside as much as possible. I put the "Christmas" label on both sides of the box, though again...clear container, it's obvious what's in there!
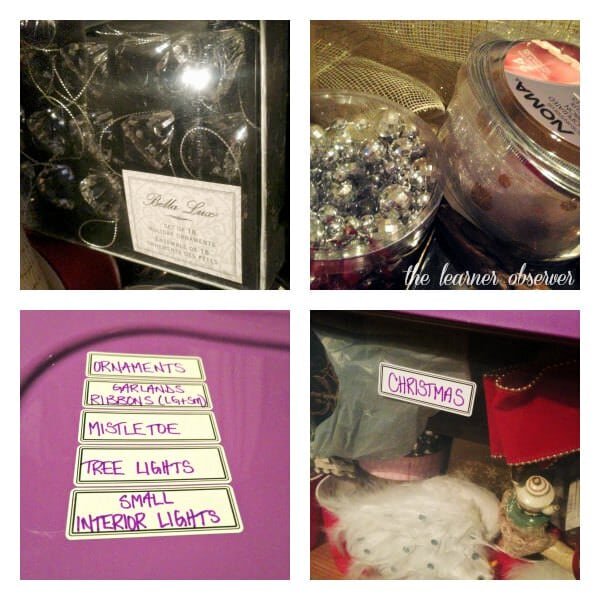 Here is the progression of empty to full...
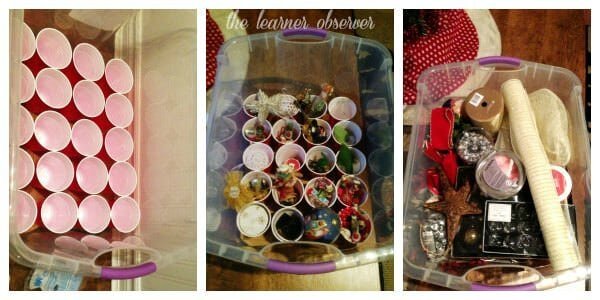 I did manage to get the tree lights in there also (after wrestling with the tree for about 20 minutes!) and the tree topper is carefully stashed away in there too. Not bad, right?
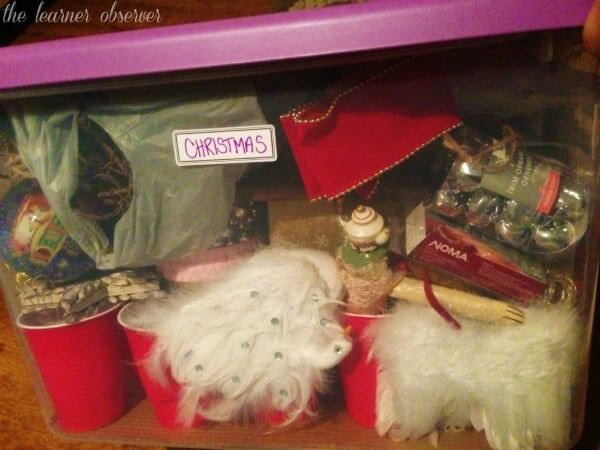 That is by far my most favourite picture... I love how in my attempt to be super organized, I ended up with a box that looks like Christmas exploded in it! Amazing... still glad I did it.Here's where I'll be linking up plus Cheerios and Lattes, The 36th Avenue, Skip To My Lou, The Shabby Creek Cottage, House of Hepworths, WhipperBerry, Savvy Southern Style, and My Repurposed Life.
 ![]()