DIY Driftwood Mirror: Rethinking a DIY Disaster!
So this a story about a DIY fail that, 3 years after making, I have (hopefully) redeemed. Thanks to a little challenge given to me by Wayfair, I got to choose one of my many DIY fails and rethink it, breathing new life into something that was just plain bad! I took a failed candle holder and made it into a driftwood mirror.And before we go further, yes, this post is sponsored by Wayfair, but all of the below words and failures are true and real! This is the project I had attempted to make:
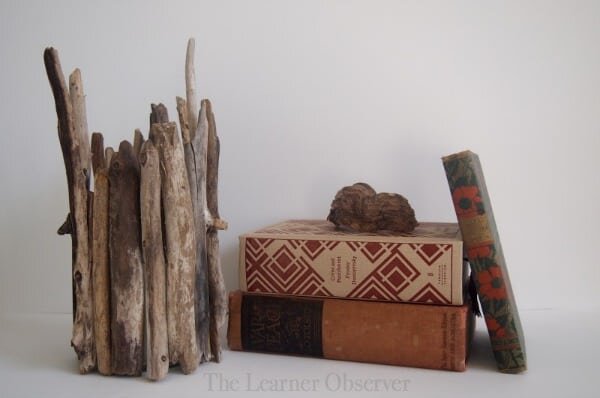 It's a driftwood candle holder that not only looks a little but sloppy because of all the different heights of the sticks, but that also completely fell apart - literally! One by one the sticks came falling down. Apparently you should really clean off driftwood before trying to glue it onto anything and I was not aware of this. I used a hot glue gun, but it just didn't stick (pun #1). Slowly the sticks made their way inside the glass vase they were supposed to be around and that's where they have been for at least the last 2 years! Here is all that driftwood now...
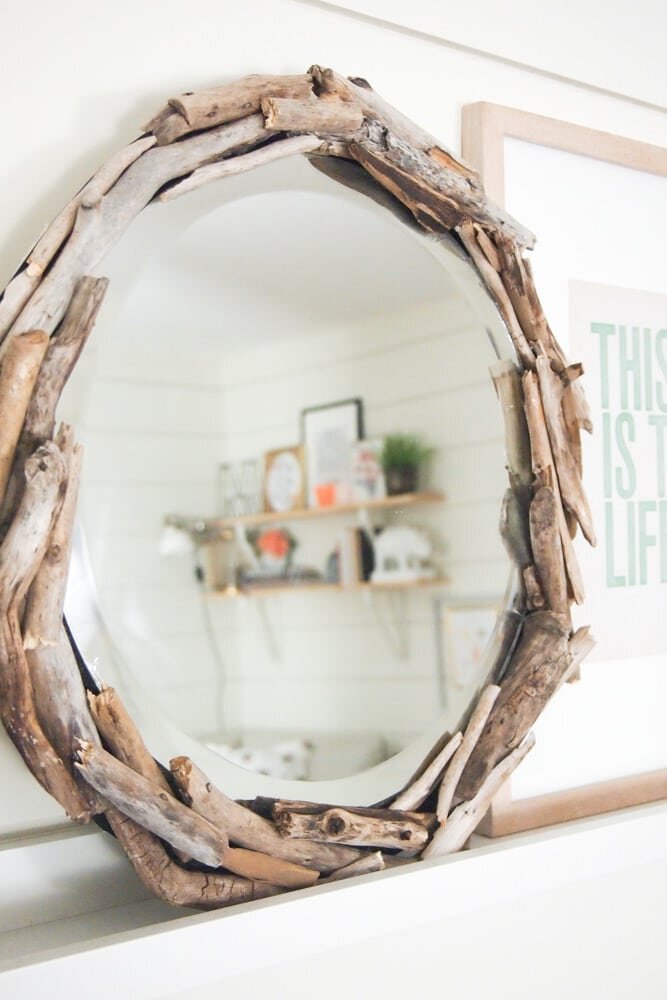 Looking a little bit better, right?I didn't know what to do with a bunch of sandy sticks until I saw this mirror that was ever so kindly left for us at our new house by the previous owners:
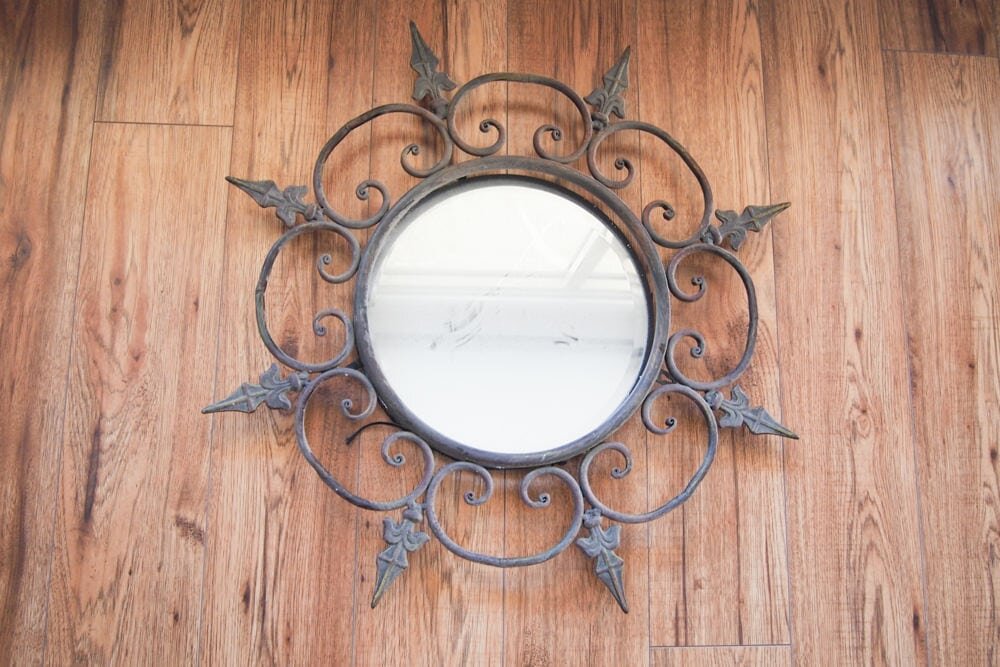 That frame just isn't very "me," so I was going to donate it, but instead, I removed the mirror and decided to give the driftwood another try.Using a screwdriver, I quickly had this thing freed from its heavy frame!
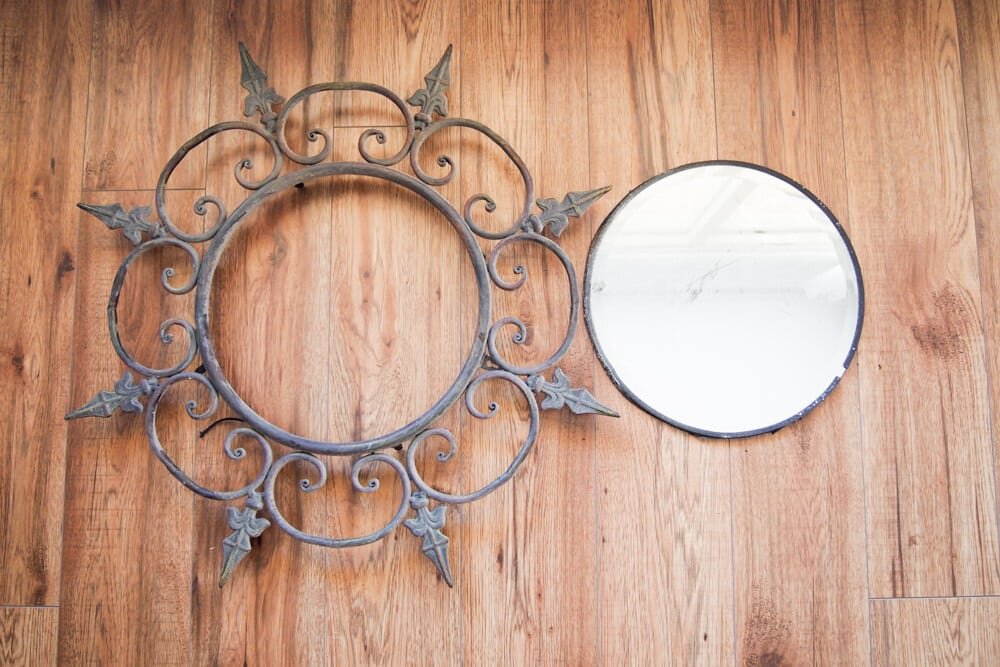 Then I grabbed some foam board and traced a slightly larger circle around the mirror, cut it out, and glued the mirror onto it. This would be the new "frame" for me to glue the driftwood onto.
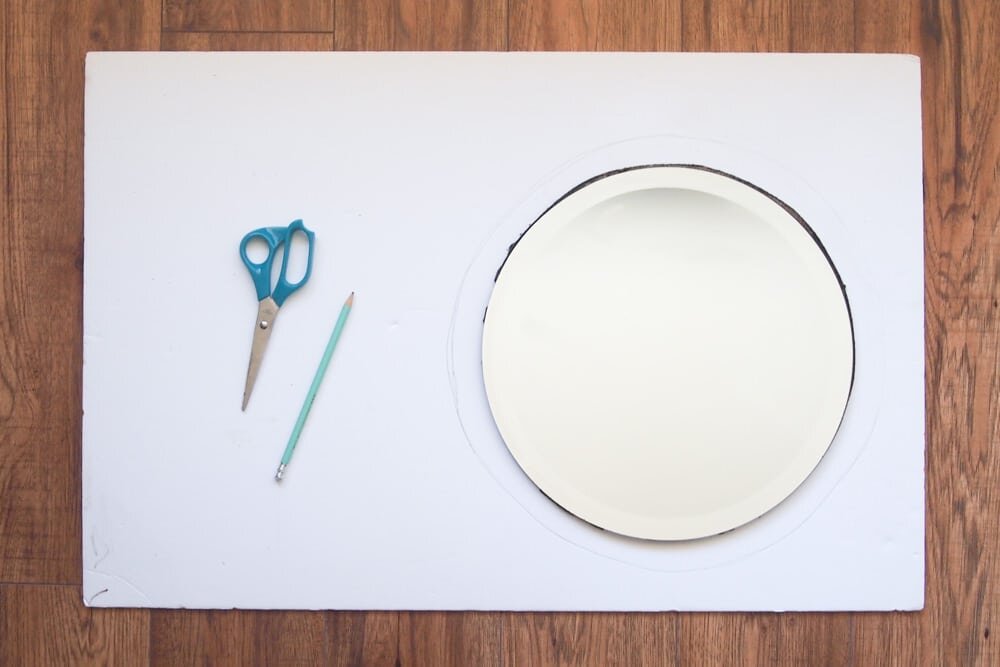
 I then did a quick dry-fit of all the sticks around the mirror to make sure it could work, and I also ended up gluing black bristol board to the foam board. I figured a dark background might make the gaps in between the sticks a little less obvious.Using a strong super glue this time (I did learn from my mistake, after all), I put the pieces onto the frame, one by one, making sure there was no more sand residue so that they would actually stay on this time!
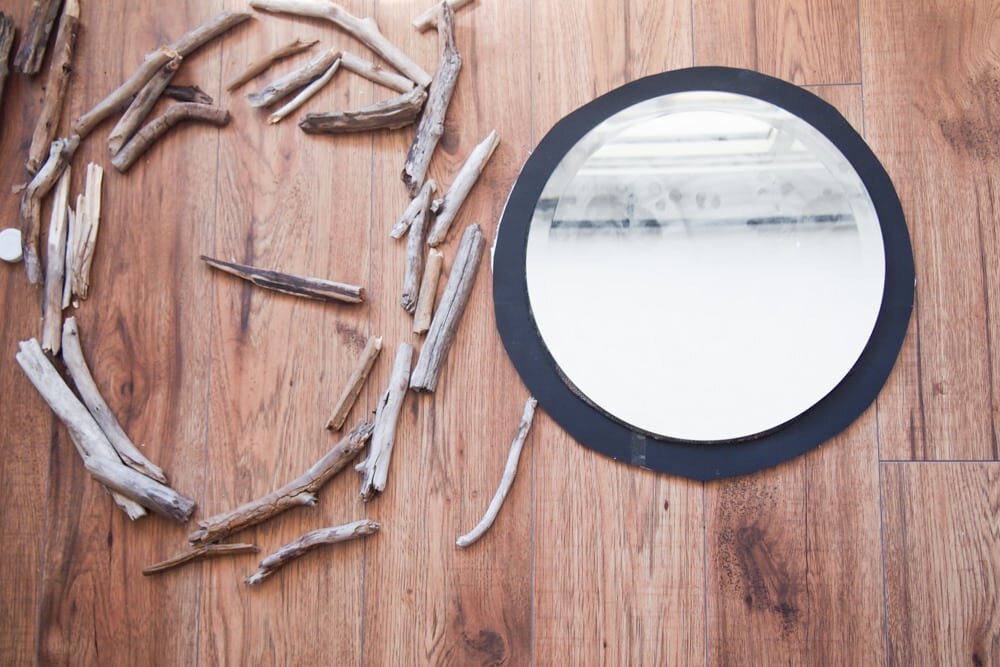 And this is what I ended up with:
 In hindsight, I kind of wish the foam/bristol board was either a little smaller or that there was some way for me to make that backing closer to the shape of the driftwood, but I'm ok with it for now. I may or may not take some scissors and cut around the sticks.
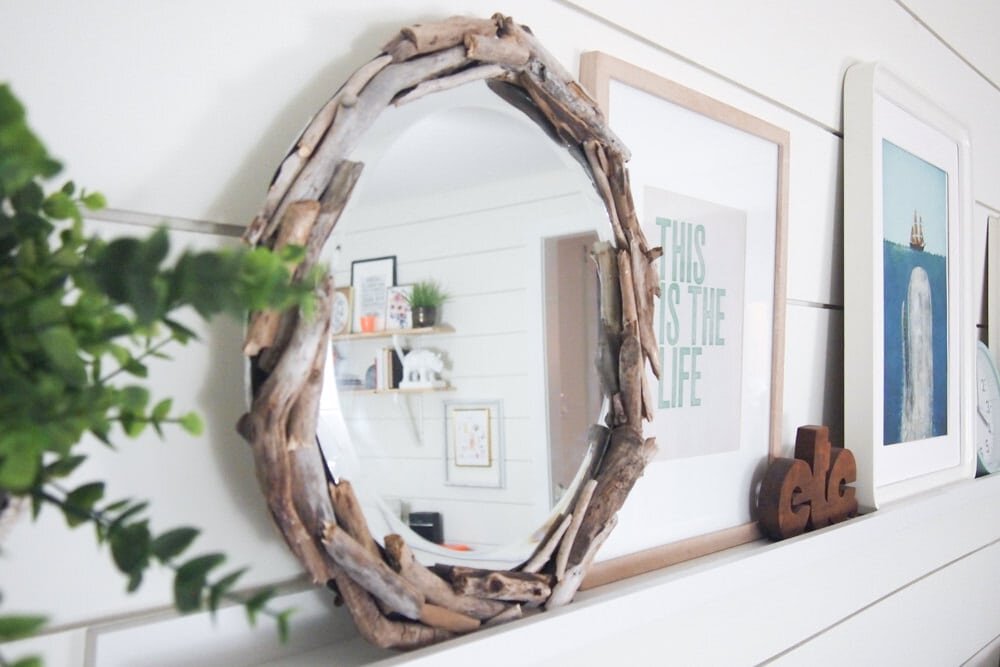
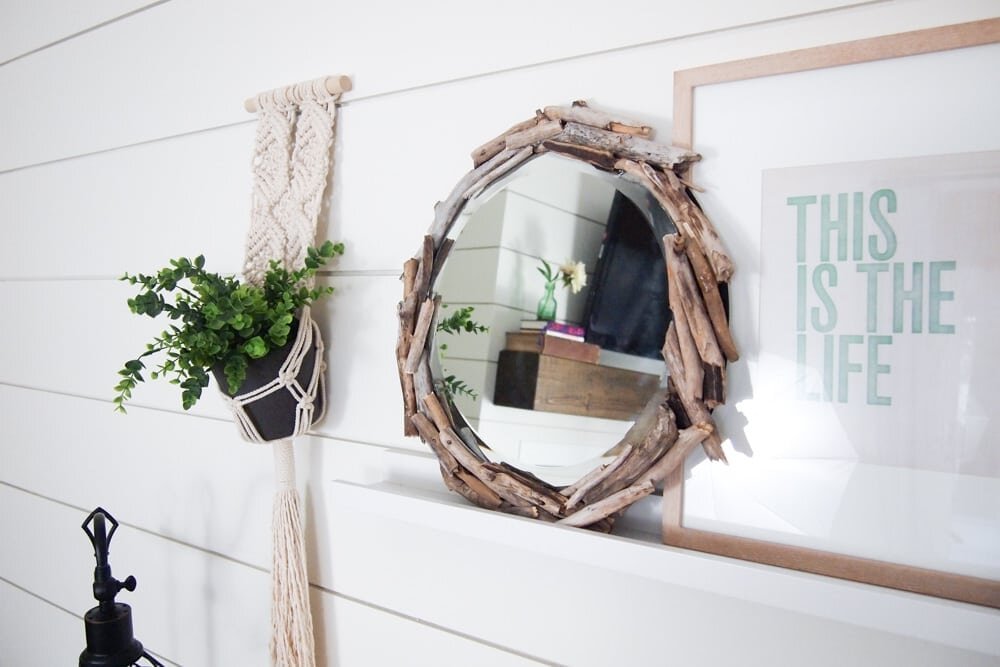
 I'm using the mirror in our family room and I love that it brings in a bit of warmth to the space. We also happen to live in a beach town, so it's very reflective of where we live. HAHA. Get it? That was pun #2, in case you missed it.
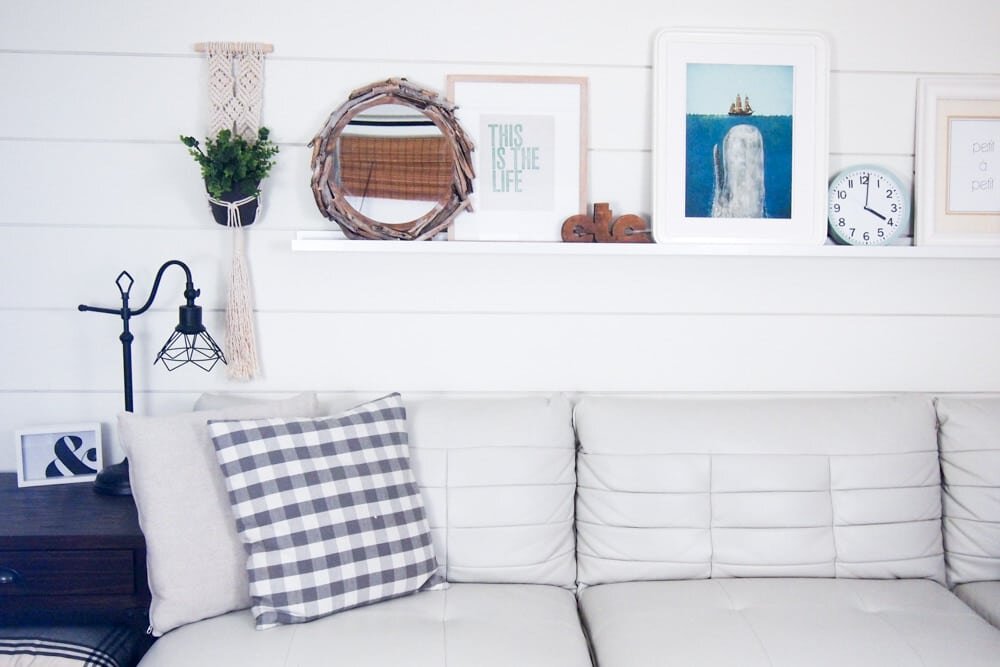 And there you have it, friends. I recreated a flopped DIY into something I now love, and that fits nicely into our home decor! Have you ever attempted to revive a failed DIY project before?If you're looking for some similar mirrors but maybe don't want to DIY it, check out this one, this one and this one!